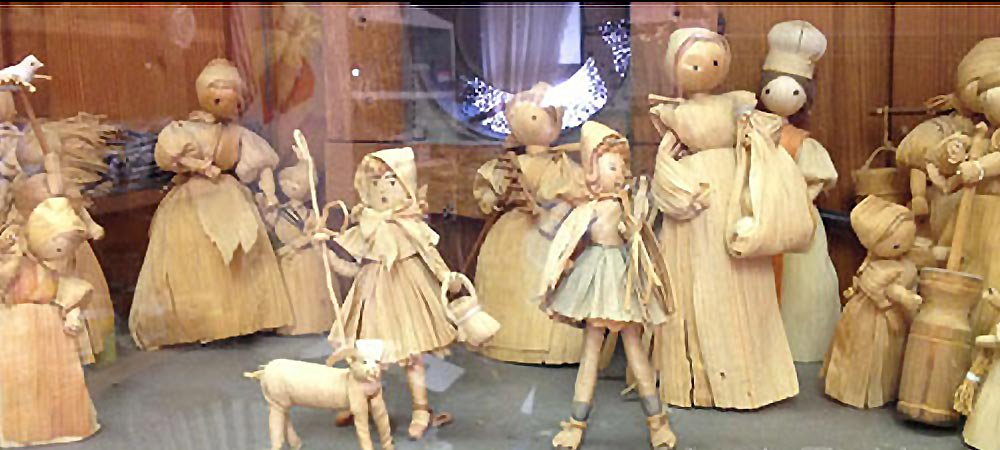
Corn Husk Dolls
What You Need:
- About 6 broad, long pieces of dried cornhusk, about 2" x 8" each. (You can often find them in the "ethnic food" section of your local grocery store; they are sold in packages for use in making tamales). They are also available in hobby and craft stores.
- Pail of warm water
- 1 yard of natural colored raffia ribbon or jute string
- Scissors
What You Do:
- When you pick up the dried cornhusks, you'll notice that they are stiff and brittle. Soften them by placing them in the pail of warm water and let them soak for at least an hour.
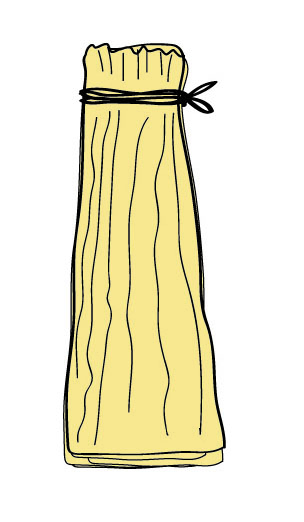
- Pull out four of the cornhusks, selecting ones that are particularly sturdy and well formed. Stack them on top of one another. With a small piece of the raffia ribbon or jute string, tie the husks together by their narrow ends, like this:
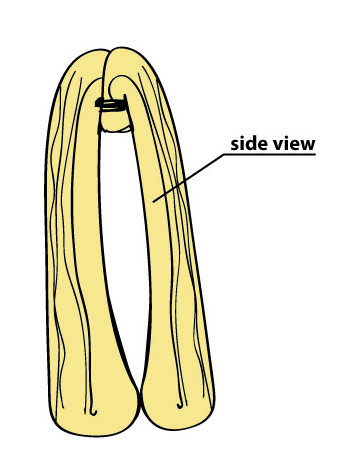
- Sticking your hand underneath where you have just tied the cornhusks together, separate the top two from the bottom ones, and bend the cornhusks up and over the tied string, like this:
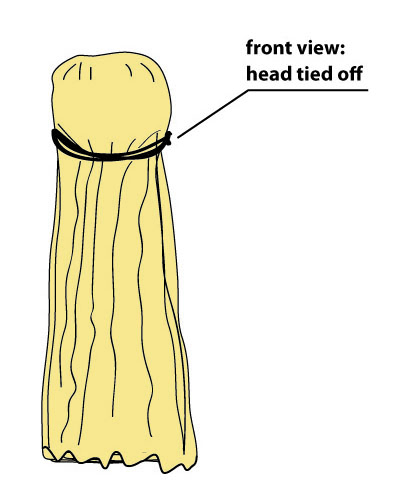
- Use another piece of raffia or string to tie the cornhusks about one inch below this folded top. Congratulations: you have just made the head of your doll! It should look like this:
- Now select two more corn husks; these may be a little shorter. Place them on top of each other, and roll them up. Use the string or raffia to tie a knot at each end of your roll. This piece will be your doll's arms, and the short piece at the end of each arm is the hand!
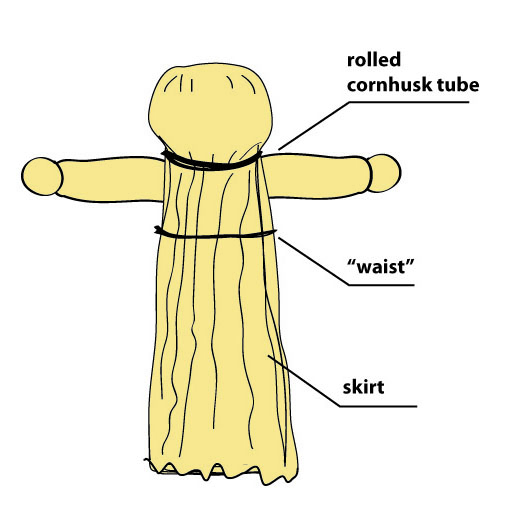
- Take your doll head and body piece, and slide the arm tube between the layers of corn husk underneath the head, as shown below. Then take an 8" piece of string or raffia and tie the husks together just under the arms, to create a "waist" for your doll, like this:
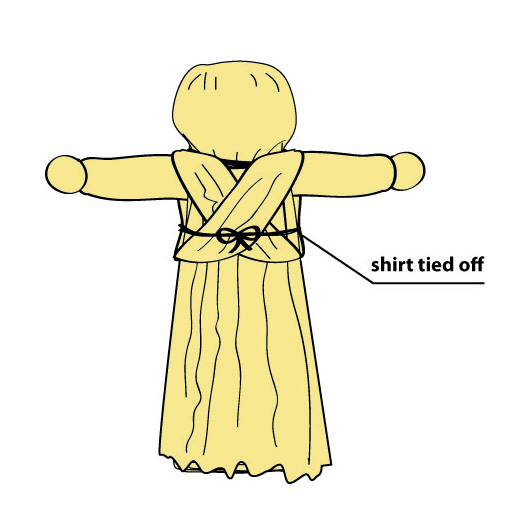
- To make a "shirt," pull out another piece of corn husk, drape it around the doll's shoulders, and cross it off on the doll's chest. Tie it off at the doll's waist with a bow, like this:
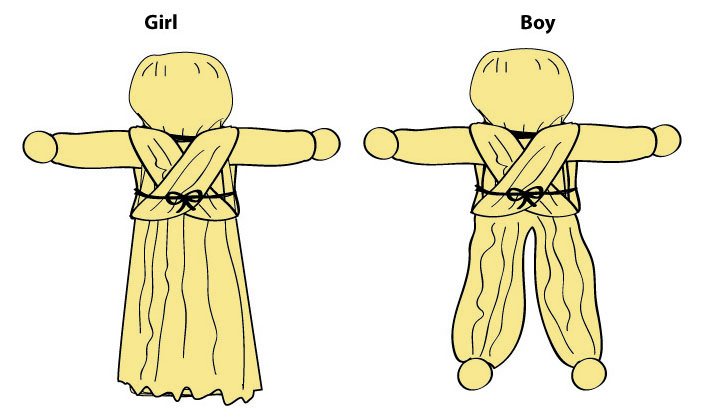
- Do you want this to be a boy or a girl doll? If you want a girl, fluff out the "skirt" a bit, and you're done! If you want a boy, split the cornhusks below your doll's waist into two sections to make legs. Tie them off at the ankles the way you tied off the doll's arms...and then be proud of this classic harvest time craft!
Original instructions from http://www.education.com/activity/article/Cornhusk_Doll/. Julie Williams, M.A. Education, taught middle and high school History and English for seventeen years. Since then, she has volunteered in elementary classrooms while raising her two sons and earning a master's in school administration. She has also been a leader in her local PTA.
