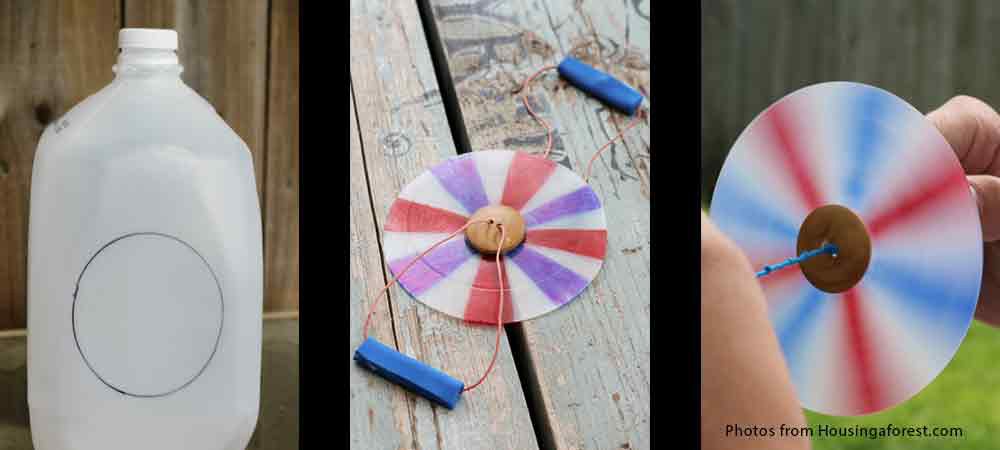
Pioneer Button Spinner
What You Need:
- Large Button
- String ~ most any thin string/yarn will work. A wax covered string will make it a little easier for the kids to use.
- Milk Jug or similar plastic from your recycle bin
- Colorful Sharpies or permanent markers
- Hot Glue gun and Glue
- Craft foam ~ (optional) to make handles
What You Do:
- Traditional Button Spinner:
- These are super easy to put together. To create the traditional spinner…simply thread the string through 2 of the button holes, tie a knot and your all set.
- Here is a YouTube video showing you how.
- To create our Colorful Button Spinner
- Simply cut a circle from a milk jug (about 3 in diameter) and color with sharpies. An alternative is an old CD. The tiny ones are better, but the normal sizes should work as well.
- Next, cut a circle out of the center of the plastic (just smaller than your button).
- We only colored one side of our plastic.
- Finally, hot glue the colorful plastic onto the button, thread the string through 2 of the button holes, tie a knot and your done! Quick and easy.
- How to make the spinner work
- Holding the string in each hand, twirl your spinner until the string is pretty tight. Stretch the string out and pull to make the button spin.Pull hard stretching and then relaxing the string by moving your hands close together and then apart. This takes practice to keep it going, but once it does it’s really cool! The spinner makes a little zinging noise as it spuns around.
These instructions were found at: http://www.housingaforest.com/homemade-toys-button-spinner/ They have a lot of really kool, fun toys that kids can make. Be sure to check them out.
